JUnit 5 parameterization
When writing automated tests, we often use parameterization, which means running the same test with different inputs. Let's find out what problems parameterization can solve and how to use it with Allure Report.
1. Preparation
Prerequisites
Make sure the following prerequisites are met:
Dependency List
This guide uses the following packages:
Code sample
The complete source code used in this guide is available at https://github.com/allure-examples/guide-junit5-parametrization.
Setup
To run the examples in this guide, you need to have Java and Allure Report installed.
Next, download a fresh project with JUnit from Allure Start.
2. Why use parameterization
We'll start with a straightforward example: adding two numbers together.
  @Test
	public void testSum() {
      assertEquals(1 + 2, 3);
  }
How do we run this test on multiple sets of data?
The first solution that comes to mind is just creating a loop inside the test. Something like this:
@Test
public void testSum() {
    final int[][] data = new int[][]{
            {1, 2, 3},
            {-1, 1, 0},
            {0, 0, 0}
    };
    for (int[] datum : data) {
        assertEquals(datum[0] + datum[1], datum[2]);
    }
}
This approach has many drawbacks:
- If the test fails on one data set, it will never reach any others after it.
- Data is accessed via an array, and there are no named variables, which hurts readability. This drawback isn't too obvious here, but if the test were better structured, it would definitely stand out.
- A test report only shows the test's name, not the particular cycle of the loop. In this setup, there is no way to make it more readable.

So, what would be a better way of doing things? JUnit5 already has an answer: parameterization. Let's use it to rewrite the previous test:
private static Stream<Arguments> dataProvider() {
    return Stream.of(
            Arguments.of(1, 2, 3),
            Arguments.of(-1, 1, 0),
            Arguments.of(0, 0, 0)
    );
}

@ParameterizedTest
@MethodSource("dataProvider")
public void testSum(int x, int y, int sum) {
    assertEquals(x + y, sum);
}
This approach allows us to solve the problems that we've talked about before:
- The test is executed multiple times, and even if one of the runs fails, you'll still get feedback from all the others.
- Data is accessed with variables (
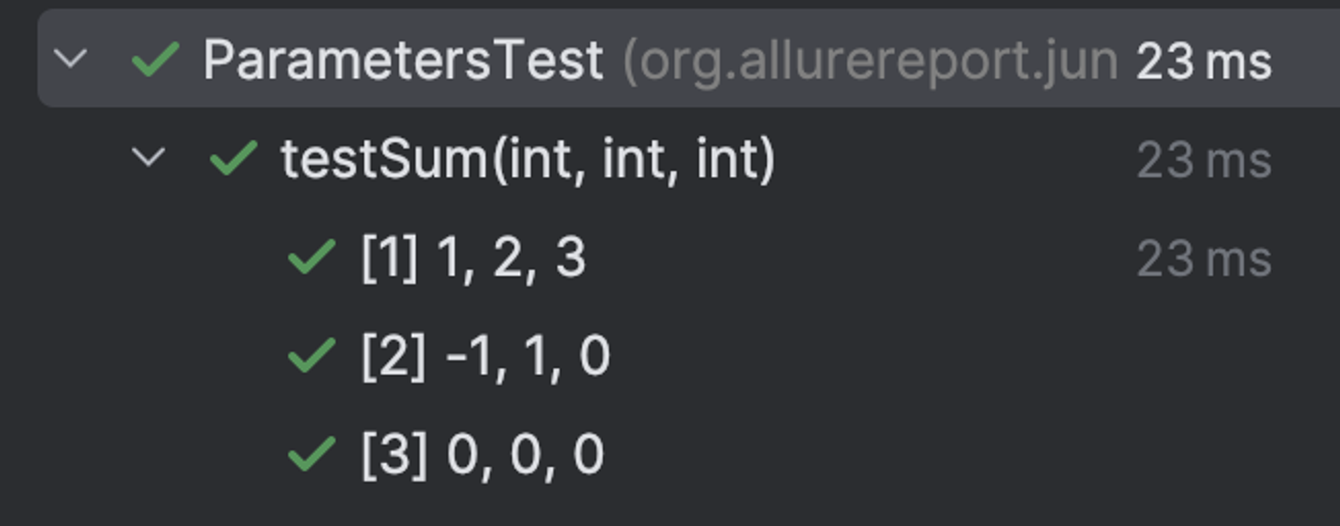
x,y, andsum), which is much more convenient. - In a report, multiple launches of the parameterized test are shown as separate test runs:
3. Parameterization in Allure
Allure Report integrates with JUnit5 and supports parameterized automated tests. But before we use them, let's find out how they work in Allure.
If you simply turn on the Allure integration, parameterized tests will unfortunately look like normal tests, just shown multiple times in the report:

Why does this happen? Because Allure has to be told about the parameters. To understand what Allure sees, run a parameterized test and then look at the allure-results folder. There, open any {uid}-result.json file and find the parameters section:
{
  "testCaseName": "testSum(int, int, int)",
  "parameters": [
    {
      "name": "UniqueId",
      "value": "[engine:junit-jupiter]/[class:org.example.junit_parameterization.SumTest]/[test-template:testSumParameterized(int, int, int)]/[test-template-invocation:#1]",
      "mode": "hidden"
    }
  ],
  "start": 1717700137076,
  "stop": 1717700137101
}
As you can see, this section does not mention x, y, or sum, which is why there is no section for parameters; they are just written as part of the method name.
How do we solve this problem?
If you want a detailed solution, you can look it up in the documentation, but for now, let's just rewrite our parameterized test like this:
@ParameterizedTest
@MethodSource("dataProvider")
public void testSum(int x, int y, int sum) {
    Allure.parameter("x", x);
    Allure.parameter("y", y);
    Allure.parameter("sum", sum);

    assertEquals(x + y, sum);
}
Now, if we re-run our example, the parameters section in the test results file will look like this:
{
"testCaseName": "testSum(int, int, int)",
"parameters": [
{
"name": "UniqueId",
"value": "[engine:junit-jupiter]/[class:org.example.junit_parameterization.SumTest]/[test-template:testSumAllurified(int, int, int)]/[test-template-invocation:#2]",
"mode": "hidden"
},
{
"name": "x",
"value": "-1"
},
{
"name": "y",
"value": "1"
},
{
"name": "sum",
"value": "0"
}
]
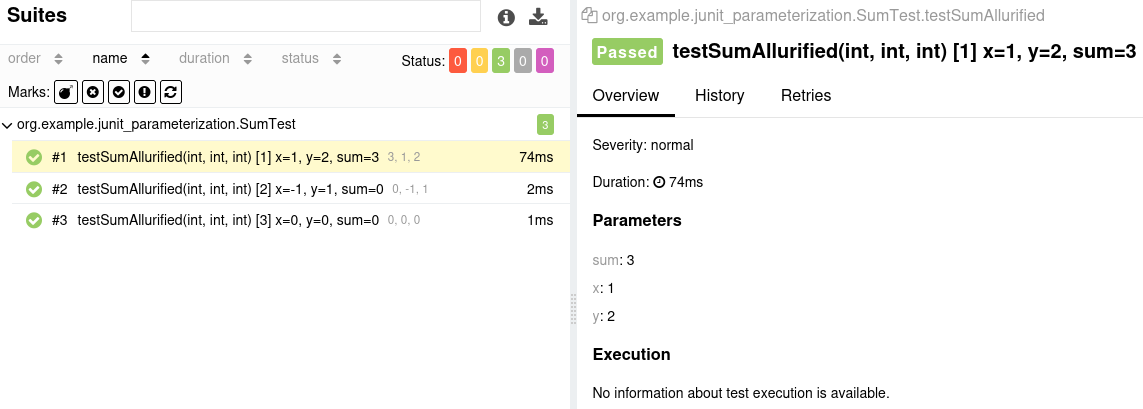
}As you can see, parameters have finally appeared in the test results, which means the report should now look like this:
4. Conclusion
Parameterization is a very useful testing technique that allows you to run the same test on multiple data sets without duplicating the test or complicating it with loops. This increases readability and makes test maintenance easier.
Parameterization is fully supported in the Allure-JUnit5 integration. The Allure integrations are constantly improved, and in upcoming versions, you might be able to achieve the same result without explicitly writing the parameters. Still, the current approach provides the required functionality and allows you to check everything before building the report.