How it works
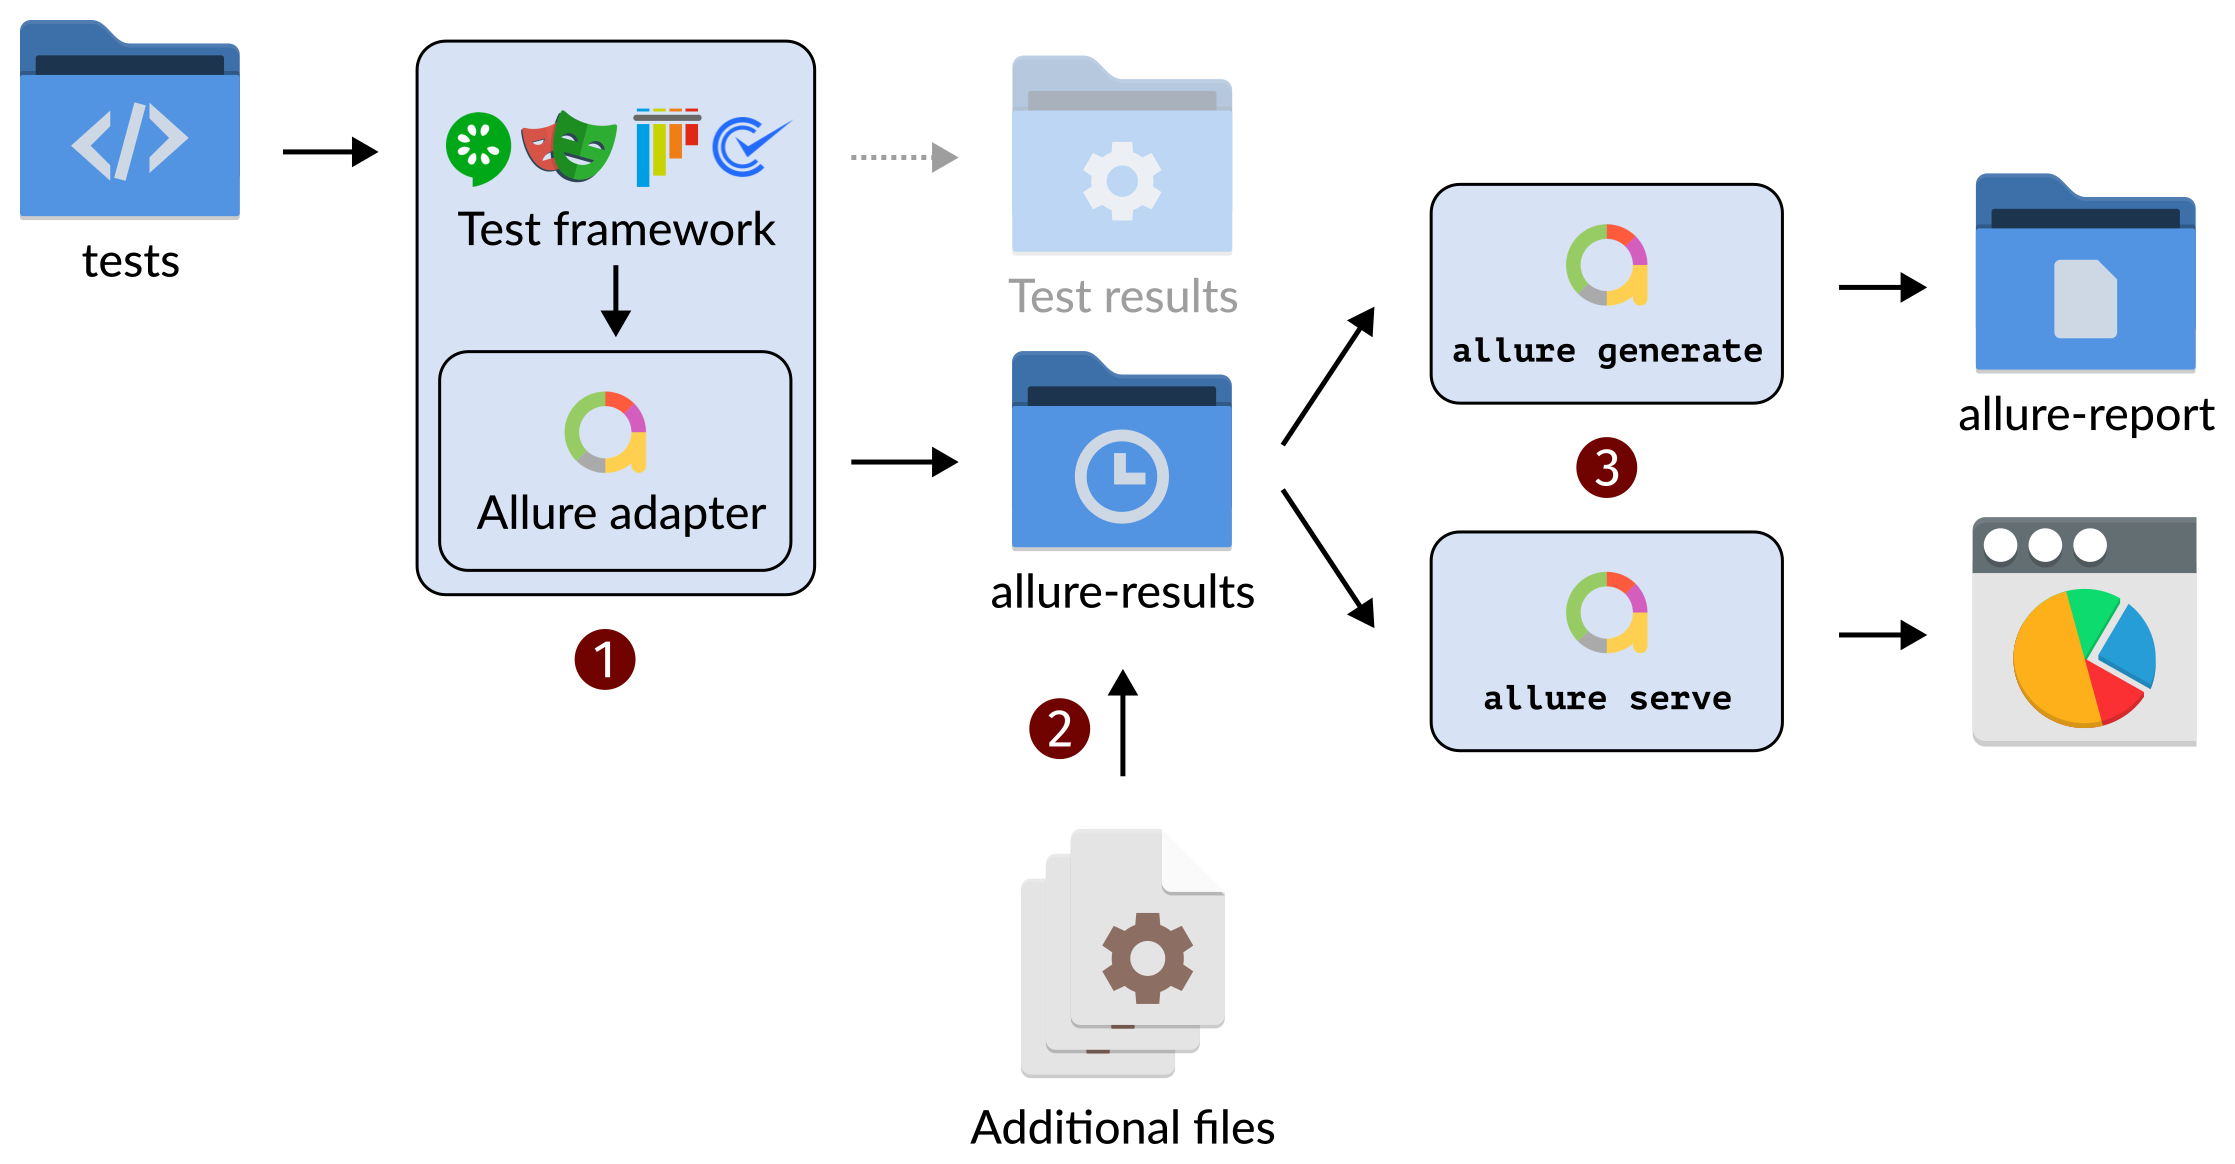
Allure Report consists of a framework adapter and the allure command-line utility. After a simple initial configuration (described below), creating a test report for your project takes no more than three steps.

Run your tests as you would do normally: from the command line, from your IDE, etc.
In addition to printing or saving the test results in its own format (Test results on the picture above), the Allure Report adapter receives the data from a test framework. The API used for this communication depends on the framework — for example, the Allure adapter may be registered as a Playwright reporter, a Cucumber.js formatter, etc.
The adapter saves data in the Allure file formats into a separate directory (
allure-resultson the picture above). The directory path can be changed in the adapter settings.The generated files include:
- test result files to describe execution of tests,
- container files to describe test fixtures.
TIP
You may run this step multiple times, accumulating data into the same results directory. This is useful, for example, if different tests require different runner parameters or different environments. As a group, these runs are referred to as a launch.
When a launch contains multiple runs of the same test, they are referred to as retries.
If necessary, put files with additional data for this launch into the results directory.
Additional files may include:
- environment file to store some global data for all the tests in the report,
- executor file to describe the CI job and the URL at which the report will be located,
- history files to enable trend graphs and other history-related features,
- categories file to group test results into custom categories.
Skip this step if you don't need to enable any of these features, or if your Allure adapter generates the files automatically. Check your adapter's documentation.
Generate the HTML report by using one of the two Allure command-line commands.
allure generateprocesses the test results and saves an HTML report into the specified directory (allure-reporton the picture above). To view the report, use theallure opencommand.Use this command if you need to save the report for future reference or for sharing it with colleagues.
allure servecreates the same report asallure generatebut puts it into a temporary directory and starts a local web server configured to show this directory's contents. The command then automatically opens the main page of the report in a web browser.Use this command if you need to view the report for yourself and do not need to save it.
To share the report, you can use the following approaches.
- You may download and archive your report, then send it via file hosting, email, Slack, or other available method.
- If you have integrated the report with a CI tool, you may share a link to the job results page that embeds the report.
- You may host the report on a web server and share the link to it.
- In the following cases, we recommend considering Allure TestOps:
- If the report needs to be available 24/7 in a centralized and secure way,
- If the report needs to be provided to non-technical team members or management who do not have access to the CI tool,
- If the archive is too large and difficult to send.
Initial configuration
The initial configuration depends on the test framework you are using. In general, the following steps are required:
Install the Allure adapter for your test framework.
Install the Allure command-line utility, see Installation.
INFO
Depending on the framework you are using, the Allure adapter may come with the Allure command-line utility included. In such a case, you may skip this step.
In your project's configuration, enable the Allure adapter and set its parameters.
See the specific adapter documentation for more details.