Integrating screenshots and other attachments in Allure Report with Selenide and JUnit 5
Reading test results has to be a very quick process. Ideally, the reader should be able to understand the source of failure without opening any additional code, running the debugger, or bothering other team members. To achieve this, we must provide as much information as possible in as little space as possible; screenshots serve this purpose very well. Let’s try taking screenshots with Selenide in some JUnit tests and viewing them with Allure Report.
1. Preparation
Prerequisites
Make sure the following prerequisites are met:
Dependency List
This guide uses the following packages:
- org.aspectj:aspectjweaver: 1.9.22
- org.junit:junit-bom: 5.10.2
- org.junit.jupiter:junit-jupiter-api
- org.junit.jupiter:junit-jupiter-engine
- com.codeborne:selenide: 7.3.1
- io.qameta.allure:allure-bom: 2.26.0
- io.qameta.allure:allure-selenide: 2.27.0
Code sample
The complete source code used in this guide is available at https://github.com/allure-examples/guide-junit5-selenide-screenshots.
Setup
To run the examples in this guide, you need to have Java and Allure Report installed.
Next, download a fresh project with JUnit from Allure Start.
Then, add Selenide to that project. With Gradle, that means adding the following lines to build.gradle:
dependencies {
    testImplementation 'com.codeborne:selenide:7.3.1'
    testImplementation 'io.qameta.allure:allure-selenide:2.27.0'
}
2. Screenshots in Selenide
Selenide takes screenshots automatically on every test failure, which is very convenient. By default, those screenshots are stored in build/reports/tests. You can control the screenshot’s location with the -Dselenide.reportsFolder=test-result/reports system property.
If you wish to take a screenshot at an arbitrary time, you can do it with just one line of code:
import static com.codeborne.selenide.Selenide.screenshot;

String pngFileName = screenshot("my_file_name");
This generates two files, PNG and HTML, in the screenshot folder.
If you want to further customize the process of taking screenshots, you can add an extension to your test class:
public class MyTest {

    @RegisterExtension
    static ScreenShooterExtension screenshotEmAll =
        new ScreenShooterExtension(true).to("target/screenshots");

}
All of this is great for taking screenshots, but viewing them isn’t very convenient: you don’t have all your data in one place, which means it takes longer to resolve test failures. To remedy that, let’s attach our screenshot to an Allure report.
3. Integrating with Allure Report
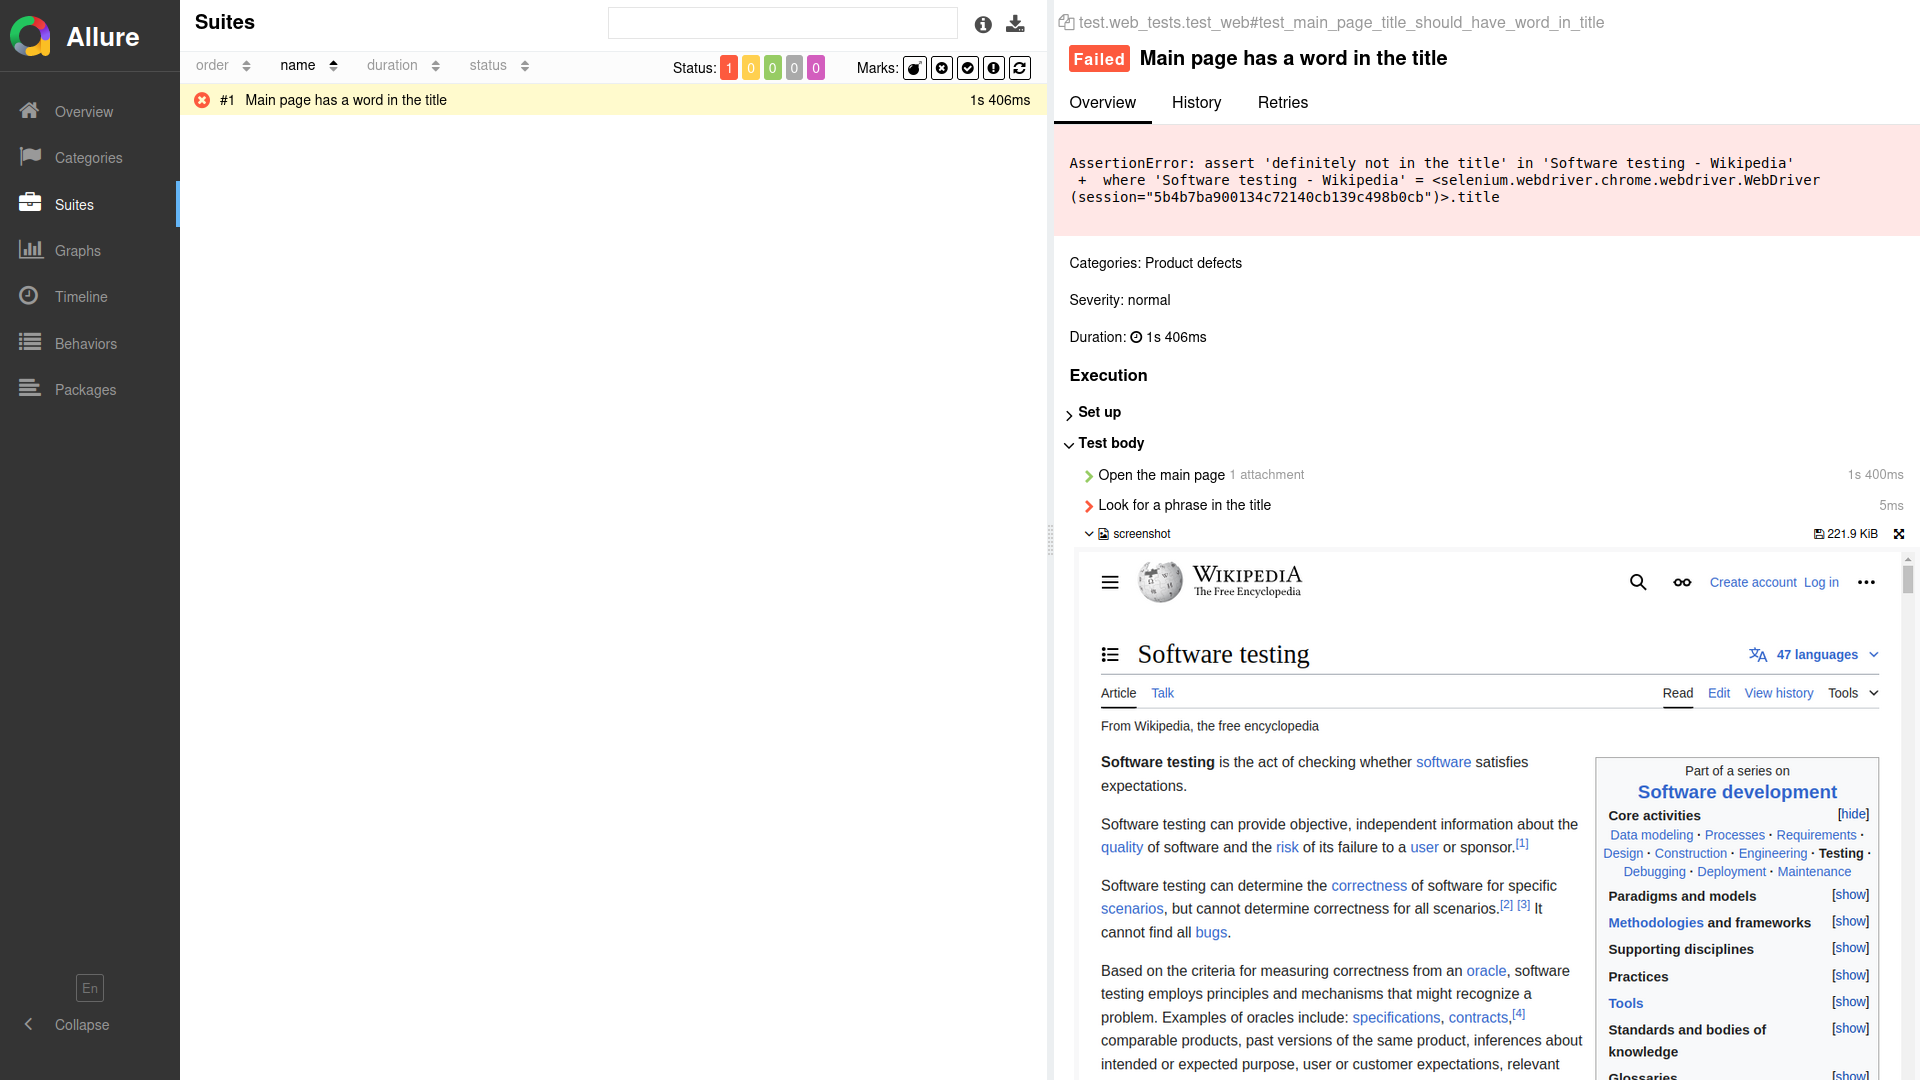
Allure Report shows you screenshots inside the test where they are taken. That is also where the error messages and other attachments are presented to you, so you have everything you need to analyze test results in one place:

Allure stores attachments in the allure-results folder; links to them are written in the JSON file that stores test results. It looks like this:
{
    ...
    "attachments": [
        {
            "name": "Screenshot",
            "type": "image/png",
            "source": "04ea4c96-5f27-42d6-8ab3-3cd390ca3d8a-attachment.png"
        }
    ],
    ...
}
You don’t have to manage screenshot placement or anything like that; it’s all done automatically.
To integrate Allure Report with Selenide, you need to use the AllureSelenide listener:
@BeforeAll
static void setupAllureReports() {
    SelenideLogger.addListener("AllureSelenide", new AllureSelenide()
           .screenshots(true)
    );
}
Allure will now automatically attach the screenshots that Selenide makes by default on test failure. You don’t have to add any extra code to the tests themselves here.
If you want to take a screenshot at an arbitrary time and attach it to Allure, you can either use the Allure.attachment method or the @Attachment annotation.
With @Attachment, you define a method that returns the data type appropriate for your attachment type:
@Attachment(type = "image/png")
public byte[] screenshot() throws IOException {
    String screenshotAsBase64 = Selenide.screenshot(OutputType.BASE64);
    return Base64.getDecoder().decode(screenshotAsBase64);
}
To ensure the browser displays the attachment correctly, it is best to specify the attachment type in the annotation arguments.
And with Allure.attachment:
public void screenshot() throws IOException {
    byte[] screenshot = Selenide.screenshot(OutputType.BYTES);
    try (InputStream is = new ByteArrayInputStream(screenshot)) {
        Allure.attachment("image.png", is);
    }
}
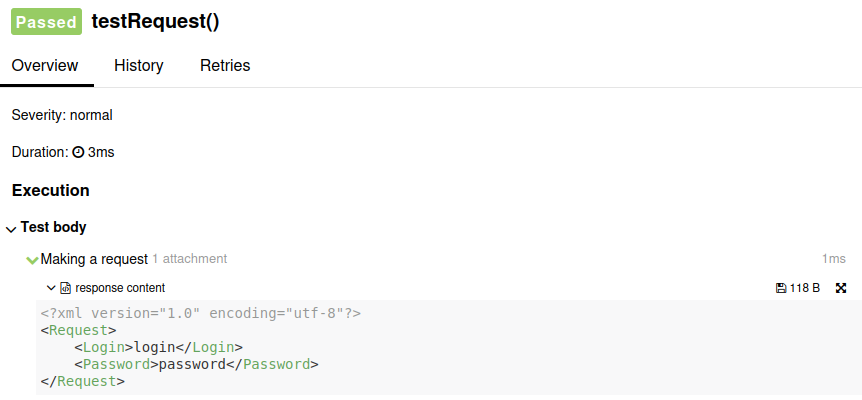
Allure Report can also handle other types of attachments - text, tables, URI lists, documents (XML, JSON, YAML). Here’s an example:
Allure.addAttachment("response content", "text/xml", responseContent);A report with such an attachment is going to look like this:

You can consult the official documentation for more on attachments with JUnit 5 and attachment types.
4. Conclusion
Selenide takes screenshots by default after each failed test, which is when you need screenshots the most; you can also generate screenshots at arbitrary times. Allure Report integrates fully with Selenide and allows you to view screenshots together with other attachment types (text, documents, tables, video) inside the respective test case, providing the reader of your test with the maximum amount of data to resolve test failures.