Allure Report 3: XCResults Reader Allure 3
Allure Report 3 introduces native support for Apple Xcode test results. You can now generate fully functional Allure reports directly from your XCTest and/or Swift Testing executions without additional conversion tools.
This article is both an overview of features and a basic integration guide for your Xcode projects.
Note
Allure 2 requires you to use the separate xcresults CLI tool to export Xcode test results into a compatible format. The vast majority of its features are present in Allure 3, and many more advanced ones were added on top. Read on to find out the details.
Getting Started
Prerequisites
TIP
The full Xcode IDE is required for proper report generation. Xcode Command Line Tools Package is not sufficient. Moreover, if you install the full Xcode IDE on top of the CLI, make sure to set it as the active development environment via xcode-select --switch
Sample Project
You can explore various examples of Xcode tests and see how Allure displays the results in its reports here:
https://github.com/allure-examples/allure3-xcresult
Generate Report
Allure Report can read Xcode test results and generate reports from them - simply use Swift Testing’s or XCTest’s standard features and Allure will automatically extract the structure, outcomes, and metadata from your test results.
You can generate a basic Allure report from your .xcresult bundle directly, no additional changes to the code required:
npx allure generate <path/to/xcresult/file> -o <path/to/report/directory>
And then open it like any other Allure report:
npx allure open <path/to/report/directory>
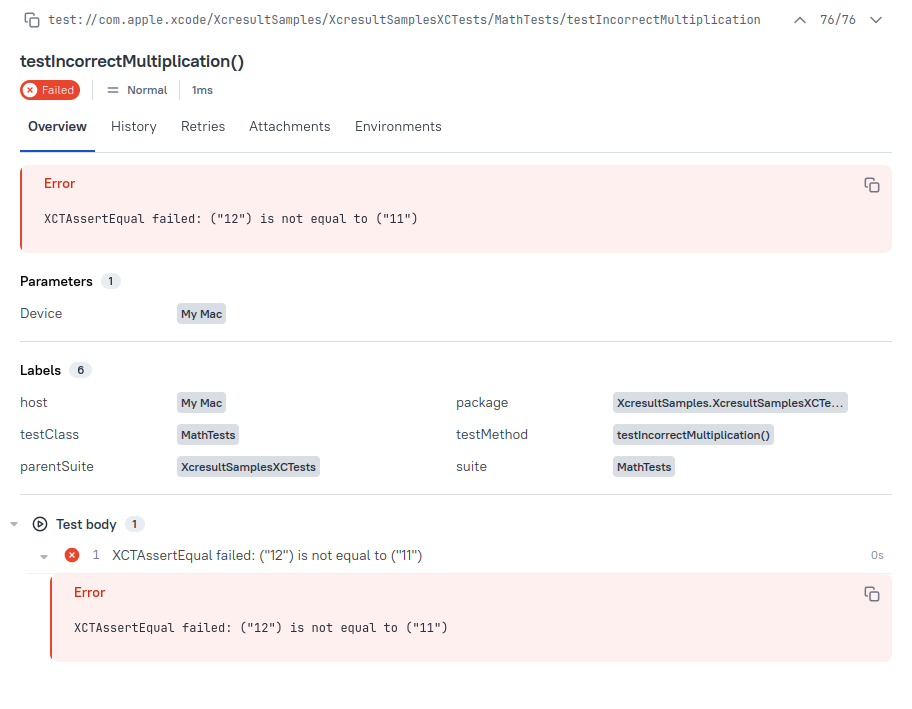
Below are some examples of Xcode tests and how they will be displayed in Allure Report.
import Testing

struct MathTests {
    @Test
    func addition() async throws {
        let result = 2 + 3
        #expect(result == 5)
    }

    @Test
    func incorrectMultiplication() async throws {
        let result = 3 * 4
        #expect(result == 11) // This will fail
    }
}import XCTest
final class MathTests: XCTestCase {
func testAddition() throws {
let result = 2 + 3
XCTAssertEqual(result, 5)
}
func testIncorrectMultiplication() throws {
let result = 3 * 4
XCTAssertEqual(result, 11) // This will fail
}
}
Supported Features
While any existing Xcode test results can be turned into an Allure Report, and most metadata will be picked up automatically, you might want to organize and label your tests a certain way to get the most out of Allure. Explore this section to learn how various features work, and how they are reflected in the resulting report.
Swift Testing and XCTest badges will be used below to mark which framework(s) a particular feature applies to.1. Setting Custom Names for Tests Swift Testing XCTest
Unless otherwise specified, Allure uses test function names as names. You can also give a custom name to your test. In Swift Testing, you accomplish this using the @Test annotation, while XCTest employs a naming convention for activities that lets you add various metadata to tests, including custom names. We'll discuss the naming convention API in more detail below.
@Test("This name was assigned to the test via the @Test annotation")
func renamedTest() async throws {

}final class AllureApiActivities: XCTestCase {
func testDisplayName() throws {
XCTContext.runActivity(named: "allure.name:This name was set by an activity", block: { _ in })
}
}2. Working With Outcomes
Failed Assertions Swift Testing XCTest
When a test result includes one or more failed assertions, it is marked as failed. The failures’ count and the details of the failures are listed on the result page.

Refer to this example to see how Allure handles multiple failed assertions specifically.
Uncaught Exceptions Swift Testing XCTest
When a test throws an uncaught exception, test frameworks mark it as failed and Allure captures the exception details in the failure report. Such tests will be labeled Broken in Allure report.

Skipping Tests Swift Testing XCTest
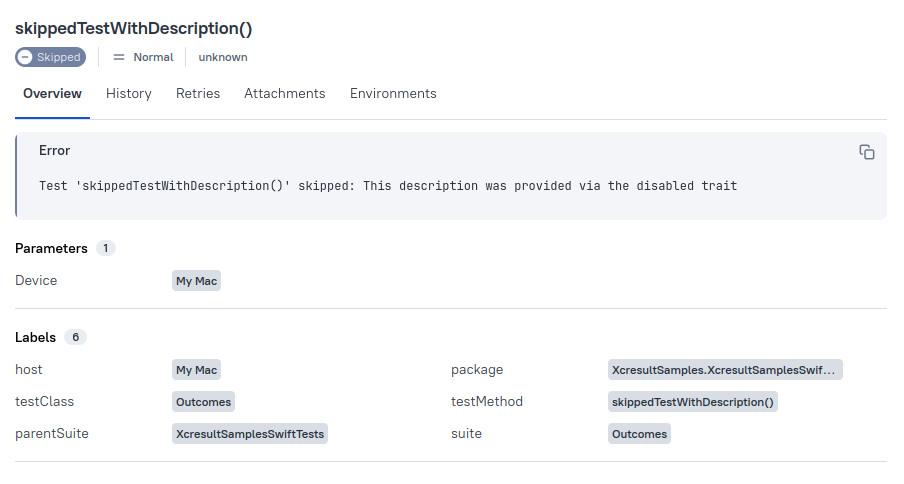
Swift Testing provides native test skipping through the .disabled() trait. You can optionally include a description explaining why the test is disabled. These appear as Skipped in Allure report with the reason displayed. XCTest supports skipping via the XCTSkip() error.
@Test(.disabled("This description was provided via the disabled trait"))
func skippedTestWithDescription() async throws {
}func testSkippedTestWithDescription() throws {
throw XCTSkip("This description was provided via XCTSkip")
}
Expected Failures XCTest
XCTest's XCTExpectFailure() allows you to mark tests containing asserts that are known to fail. When an expected failure occurs, the test passes. If the test unexpectedly passes or fails in a different way, it's marked as failed. Allure distinguishes between expected and unexpected failures in the report.
func testOneExpectedFailureWithMessage() throws {
    XCTExpectFailure("This message was set via XCTExpectFailure")
    XCTAssertEqual("foo", "bar")
}

func testUnmetExpectedFailure() throws {
    XCTExpectFailure()
    XCTAssertEqual("foo", "foo")  // This passes, but we expected it to fail
}
In the example above testOneExpectedFailureWithMessage will be marked as passed in Allure, as we expected the assertion inside it to fail, while testUnmetExpectedFailure will be displayed as failed - as we expected the assertion to fail, but it passed instead.
XCTExpectFailure() works in a logical OR manner: if at least one assertion after this function fails, the whole test passes. Otherwise, the test fails.
Example: code sample and the report generated based on it.
3. Test Grouping and Labeling
Allure 3 can be configured to group test results into a convenient navigation tree by a wide variety of labels. This section discusses how these labels are mapped and processed by the tool.
3.1. Suites and Suite Hierarchy Swift Testing XCTest
Allure has three levels of suites:
- parentSuite
- suite
- subSuite
The exact mapping of these levels depends on the test framework.
Swift Testing
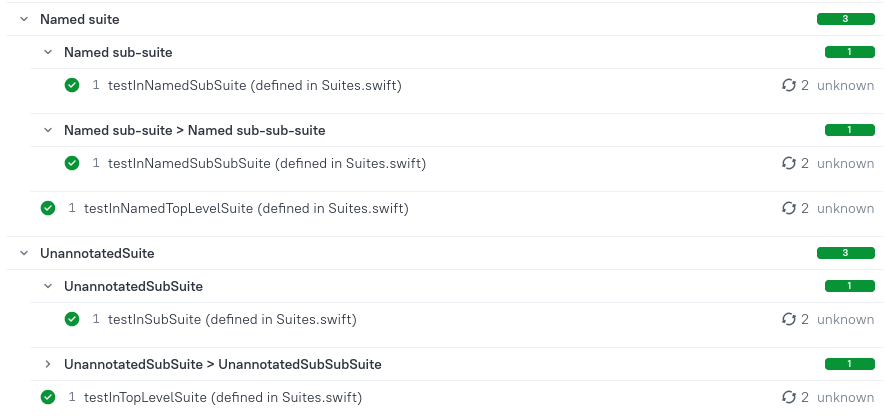
Suite hierarchy is mapped to Allure's navigation tree, creating a nested organization in the Allure report matching your code structure:
The module name always becomes the parentSuite in Allure
The top-level Swift Testing suite becomes the suite in Allure
nested suites become subSuites (if there are more than two nested suites, they are joined with > and the result is assigned to subSuite)
Unannotated suites use struct names (
UnannotatedSuite→UnannotatedSubSuite)Named suites use custom names (
Named suite→Named sub-suite)testClass and testMethod labels always hold the original names of the class/struct and the method.
// Unannotated suite - uses struct name
struct UnannotatedSuite {
    struct UnannotatedSubSuite {
        struct UnannotatedSubSubSuite {
            @Test("testInSubSubSuite (defined in Suites.swift)")
            func testInSubSubSuite(){

            }
        }

        @Test("testInSubSuite (defined in Suites.swift)")
        func testInSubSuite(){

        }
    }

    @Test("testInTopLevelSuite (defined in Suites.swift)")
    func testInTopLevelSuite(){

    }
}

// Named suite with @Suite annotation
@Suite("Named suite") struct NamedSuites {
    @Suite("Named sub-suite") struct NamedSubSuite {
        @Test("testInNamedSubSuite (defined in Suites.swift)")
        func testInNamedSubSuite(){

        }
    }

    @Test("testInNamedTopLevelSuite (defined in Suites.swift)")
    func testInNamedTopLevelSuite(){

    }
}
XCTest
For XCTest, Allure suites are based on the class structure of the test files:
- The module name always becomes the parent suite in Allure
- Each class becomes a suite in Allure
- testClass label shows the class name
- suite label typically matches the class name
final class Activities: XCTestCase {
    func testOnePassedActivity() throws {
        XCTContext.runActivity(named: "Step 1", block: { _ in })
    }

    func testOneActivityWithOneFailedAssertion() throws {
        XCTContext.runActivity(named: "Step 1") { _ in
            XCTAssertEqual("foo", "bar")
        }
    }
3.2. Packages Swift Testing XCTest
Allure automatically creates package labels using the format <project>.<bundle>:
Examples from the sample project:
XcresultSamples.XcresultSamplesSwiftTests(Swift Testing tests)
These appear as package labels in Allure reports.
3.3. Activities and Steps XCTest
XCTest supports organizing tests into activities within a single test function, which Allure then translates into steps. Each activity becomes a step (or substep) in the test execution flow.
func testSixNestedSteps() throws {
    XCTContext.runActivity(named: "Step 1") { _ in
        XCTContext.runActivity(named: "Step 1.1") { _ in

        }
        XCTContext.runActivity(named: "Step 1.2") { _ in

        }
    }
    XCTContext.runActivity(named: "Step 2") { _ in
        XCTContext.runActivity(named: "Step 2.1") { _ in

        }
        XCTContext.runActivity(named: "Step 2.2") { _ in

        }
    }
}
TIP
Allure has an API that allows to add native Allure metadata (which XCTest doesn’t support) to your tests by naming activities according to a certain convention, which we discuss in the section below. Allure doesn’t translate activities named according to the API convention into steps.
3.4. Allure API: Metadata Naming Convention XCTest
XCTest activity names additionally serve as a vehicle to add native Allure metadata and labels to your tests.
The allure.* prefixed activity names become rich metadata in the report:
allure.name:sets custom test namesallure.label.*:adds Allure labelsallure.parameter.*:adds parameter information with masking optionsallure.description.:adds a descriptionallure.link.*:adds a link (there are convenient shorthands for adding links to bugs, which we discuss below)allure.flakymarks a test as flaky.
func testDisplayName() throws {
    XCTContext.runActivity(named: "allure.name:This name was set by an activity", block: { _ in })
}

func testLabel() throws {
    XCTContext.runActivity(named: "allure.label.owner:John Doe", block: { _ in })
}

func testParameters() throws {
    XCTContext.runActivity(named: "allure.parameter.Regular parameter:Value 1", block: { _ in })
    XCTContext.runActivity(named: "allure.parameter.Masked parameter[masked]:Value 2", block: { _ in })
}
TIP
Allure doesn’t translate such activities into test steps, so you shouldn’t put any actual test code in them.
Make also sure that activities used to insert Allure metadata into tests are not nested, otherwise they won’t be properly recognized. This is a change from Allure 2’s xcresultstool CLI tool behavior, that parses even nested activities for metadata.
Example: code sample and report
3.5. Tags Swift Testing
Allure 3 supports Swift Testing tags. Currently they are displayed among the labels on the test result page, and in future releases it will be possible to filter by them.
extension Tag {
    @Tag static var fromSuite: Self
    @Tag static var fromSubSuite: Self
    @Tag static var fromTest: Self
}

@Suite(.tags(.fromSuite)) struct Tags {
    @Suite(.tags(.fromSubSuite)) struct SubSuite {
        @Test(.tags(.fromTest)) func hasTagsFromBothSuitesAndTest() {

        }

        @Test func hasTagsFromSuitesOnly() {

        }
    }

    @Test(.tags(.fromTest)) func hasTagsFromOneSuiteAndTest() {

    }
}
Example: code sample and report.
3.6. Test Repetitions Swift Testing XCTest
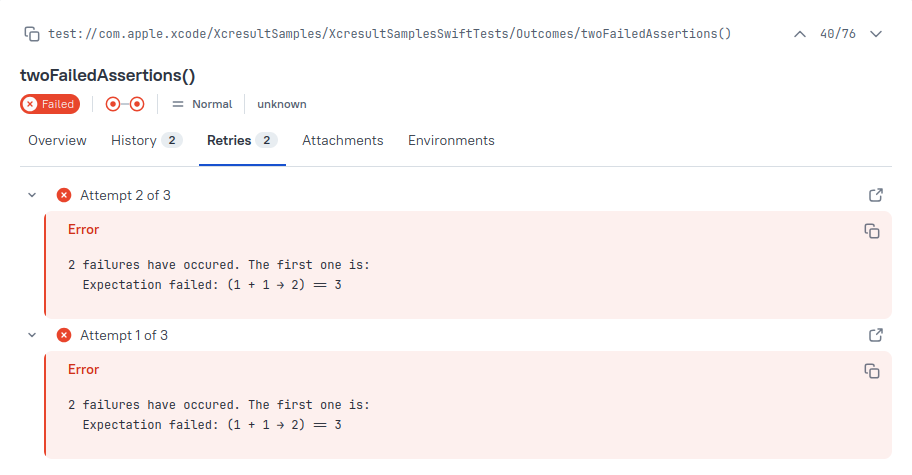
Allure supports repeated test executions, if the source bundle contains them. You can find repetition results on the Retries tab of a test result page.
TIP
‘Retries’ is the term that Allure uses for repeated test executions. It has the same meaning as ‘repetitions’ in Xcode.
3.7. Destinations (Devices) and Multiple Test Plans Swift Testing XCTest
Allure automatically labels all Xcode tests with the destination (the physical or emulated device the tests run on), as well as with Test plan names, if such data exists in the source bundle.
If your result bundles contain result data for multiple destinations or test plans, you can generate an Allure report with all records, provided you merge the bundles from different destinations and/or test plans into a single bundle with the xcresulttool merge command first and then use the merged bundle to generate your Allure report.

If the source bundle contains test results for more than one destination, Allure displays the Device Details parameter in addition to the Device parameter.
Similarly, if the bundle contains test results for more than one test plan, Allure displays the Test Plan parameter.
4. Parameterized Tests Swift Testing
Parameterized testing is a native feature of Swift Testing that allows running the same test with different input values. XCTest does not have built-in parameterized test support.
struct Parameters {
    @Test(arguments: ["foo", ""], [1, 2])
    func twoParametersOneFail(Text text: String, Count count: Int) async throws {
        #expect(!text.isEmpty) // Fails for ("", 1) and ("", 2)
        #expect(count > 0)
    }
}
In Allure report each combination of parameters becomes a separate test result grouped under a single Suite. For each test result, parameter values are listed in the report.
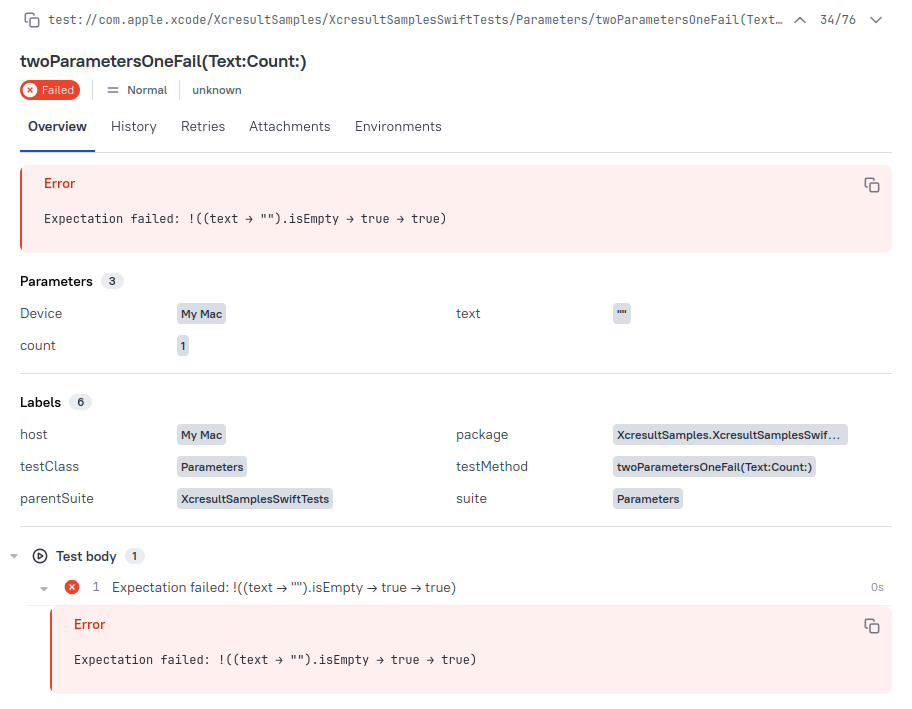
Example: code sample and report.
5. Issue Tracking Swift Testing XCTest
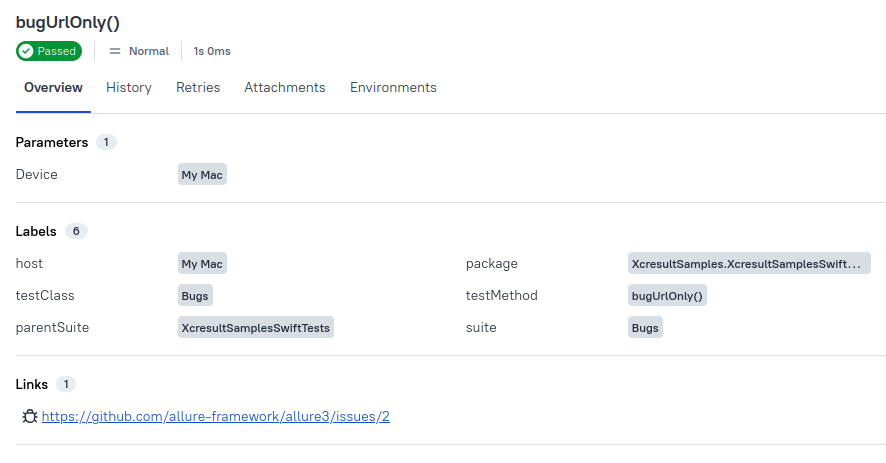
Issue tracking is a native feature of Swift Testing that allows linking tests to known issues. XCTest does not have built-in issue tracking support, but just like with custom names, the Activity naming convention can be used to add links to issues.
In Allure, if this metadata is given, it is transformed into clickable issue links.
@Test(.bug("https://github.com/allure-framework/allure3/issues/2", id: "2", "Issue #2"))
func bugUrlNameAndId() async throws {
}func testIssueLink() throws {
XCTContext.runActivity(named: "allure.issue.Issue 2:https://github.com/allure-framework/allure3/issues/2", block: { _ in })
}
6. Attachments XCTest
Attachments allow you to include additional data (text, screenshots, logs) with your test results for debugging and analysis. Swift Testing will support basic attachments in Swift 6.2, but currently only XCTest provides full attachment capabilities.
func testTextAttachment() throws {
    XCTContext.runActivity(named: "allure.description:The attachment is visible in the 'Multiple destinations' report only", block: { _ in })
    let attachment = XCTAttachment(string: "Lorem Ipsum")
    attachment.name = "A text attachment"
    self.add(attachment)
}
Text attachments can include logs, debug information, or any string data. You can optionally provide a name for better organization. Unnamed attachments get default names in Allure reports.
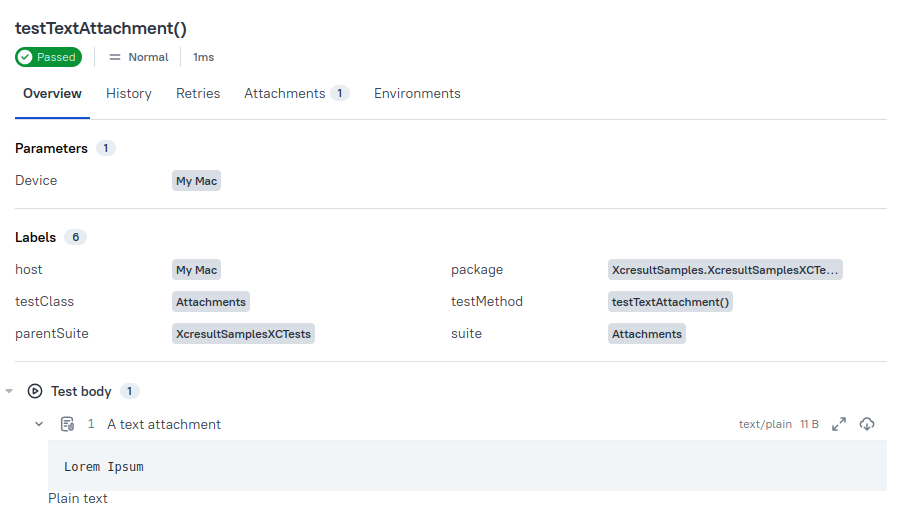
Unlike Allure 2, in Allure 3 attachments are displayed chronologically, in the order they were created.
Depending on type, attachments are handled differently. Images, for example, will be rendered within Allure report itself and can be conveniently downloaded.
Example: code sample and report.
7. UI Testing XCTest
UI testing is exclusively available through XCTest and provides capabilities for automating user interface interactions and capturing visual evidence.
Allure recognizes image and video attachments generated by the XCTest UI testing and stores them in the relevant test steps.

Example: code samples and reports (screenshots and recordings).
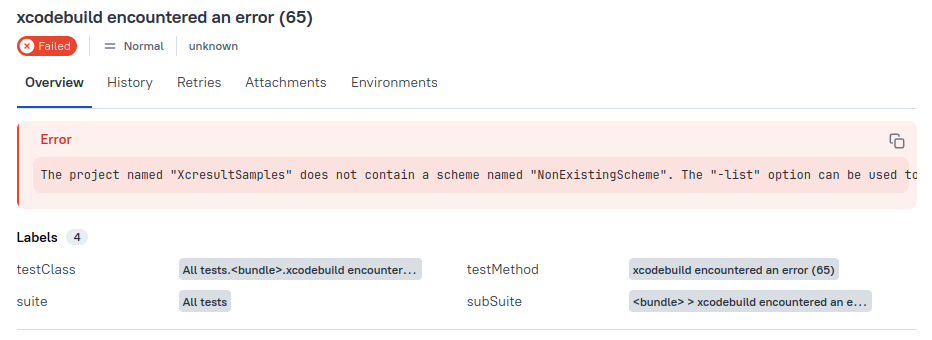
8. Build Errors
Allure processes build failures as well. If the source bundle contains a single run resulting in a build failure, it will be the only result in the Allure report. If the bundle has multiple runs, some with build failures and others with test results, build failures will be displayed alongside the test outcomes.
